Adding Narration to Your Pictures
You can add narration and custom pan and zoom effects to your photo story to make it more unique and personal.
To add narration to your story you need to have a working microphone attached to your computer and set up correctly. A wizard will help you set up your microphone to record narration. There is also a text input area to create cue cards which can be a helpful memory aid when narrating your pictures.
To add narration to your story you need to have a working microphone attached to your computer and set up correctly. A wizard will help you set up your microphone to record narration. There is also a text input area to create cue cards which can be a helpful memory aid when narrating your pictures.
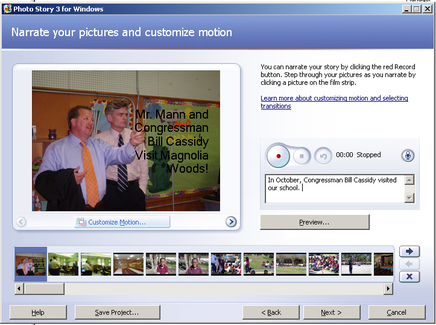
1. On the Narrate your pictures and customize motion page, click the Microphone button.
This will launch the Sound Hardware Test Wizard. Complete the wizard by following the onscreen instructions. Once you have completed the wizard, your microphone should be ready to record narration.
2. Click a picture in the filmstrip.
3. Add any desired text in the cue card area.
4. Record Narration button to start recording narration.The red dot in the record button will flash indicating recording is taking place. A timer is provided to help you keep track of your narration length.
5. When you have finished narrating the picture, click the Stop Recording button.
6. Repeat steps 2 through 4 for each picture you want to add narration.
Note: Narration for each picture can not exceed 5 minutes.
7. Once you have added narration, click the first picture in the filmstrip, and then click Preview to see how your story looks and sounds.
8. Close the preview window, and click Next to continue to the next step.